
CSV Import
Overview
The CSV Import feature allows you to bulk import test case or test execution data from a CSV file. The import process is organized into a four-step wizard for a smooth and intuitive user experience.
Key Features
Upload and preview CSV files
Automatic column mapping
Import progress display
Important Notes
A header row is required in the CSV file
Use a file exported via the CSV Export feature as a reference (CSV Export )
Attachments (e.g., images, videos) cannot be imported at this time
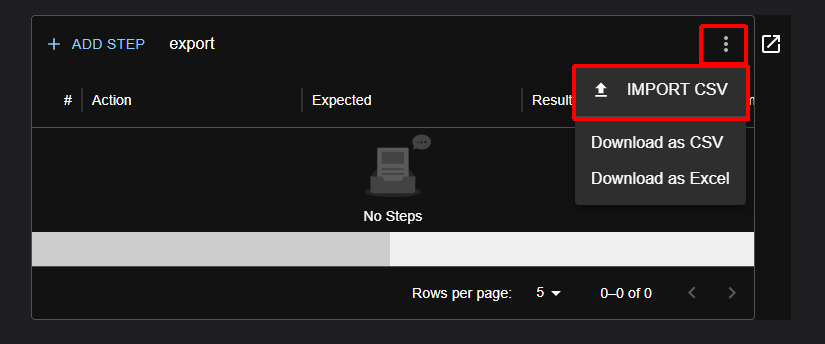
Step-by-Step Instructions
Step 1: CSV File Selection
Select the CSV file you want to import.
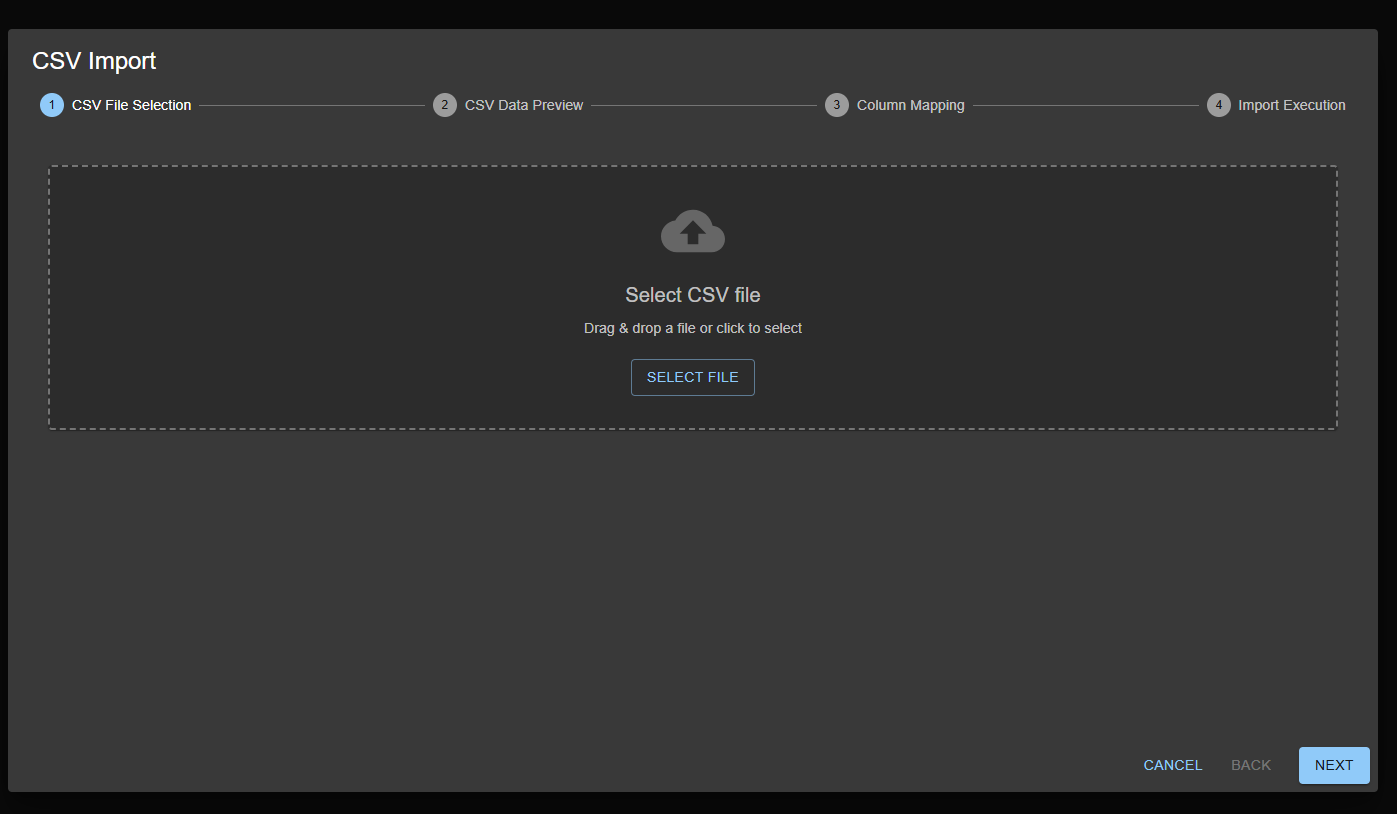
Instructions
How to select a file:
Click the Select File button to open the file selection dialog
Or, drag & drop the CSV file directly
File requirements:
Format: CSV (.csv extension)
Encoding: UTF-8
Required: The first row must contain a header row
After successful load:
A message, "CSV file loaded successfully!" will appear
The process automatically moves to the next step
Step 2: CSV Data Preview
Preview the contents of the selected CSV file.
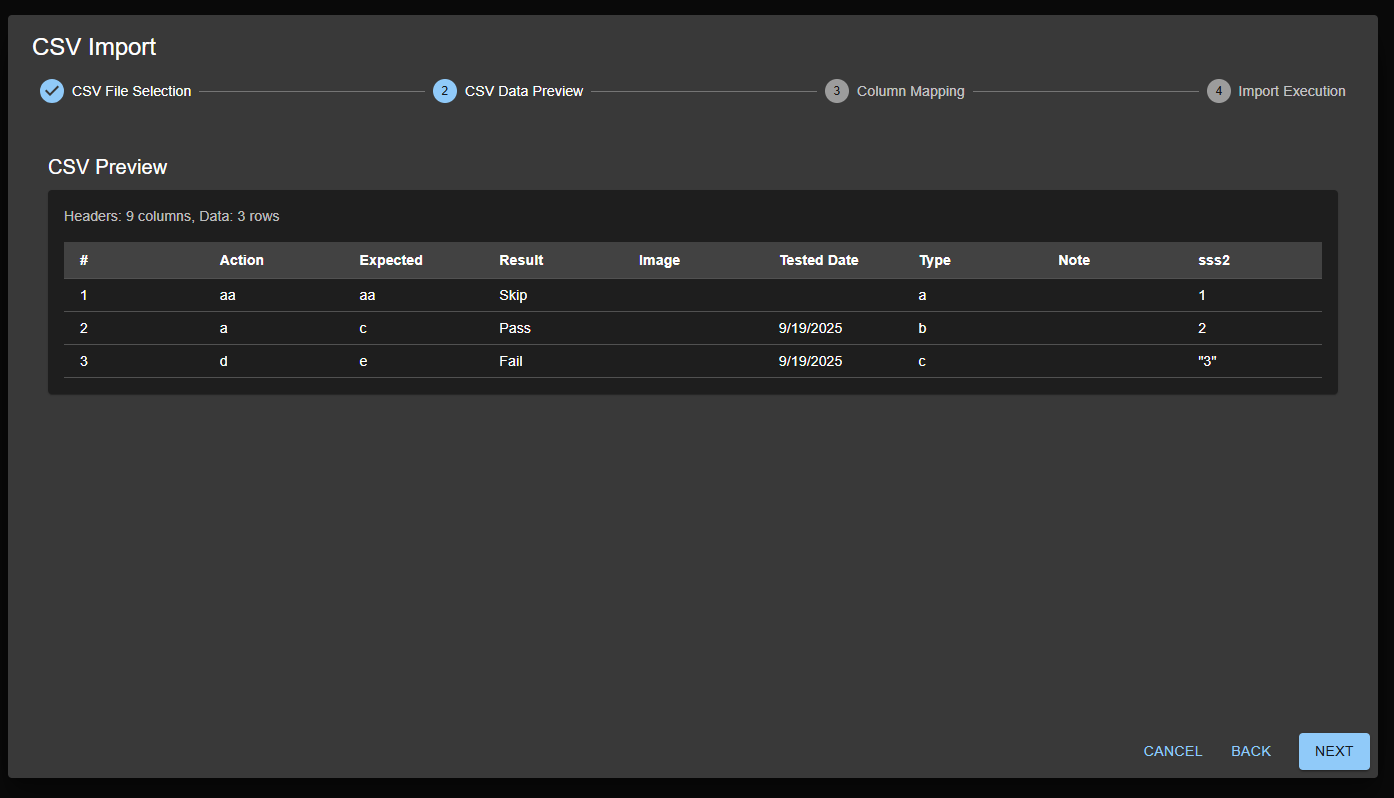
Displayed Information
Header Information: Number of columns and rows detected
Data Table: Displays CSV data in a table format
Checkpoints
Ensure the header row is correctly recognized
Verify that data loads as expected
Check for garbled text or formatting errors
Step 3: Column Mapping
Map each CSV column to the appropriate test macro column (system or custom columns).
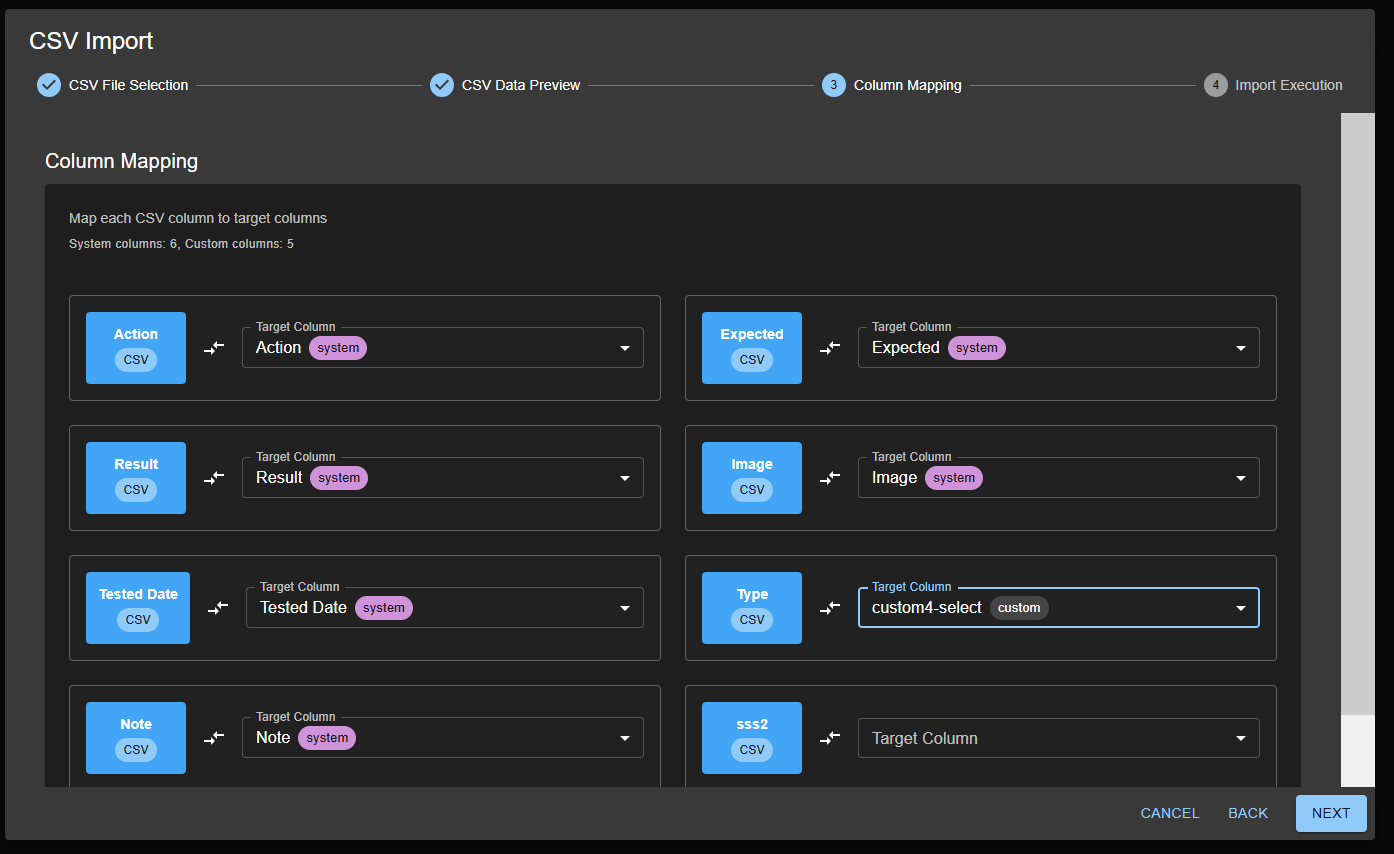
Automatic Mapping
The system automatically maps columns using the following rules:
Exact match: CSV column name matches the system column name exactly
Partial match: A part of the column name matches
Similarity calculation: Levenshtein distance similarity ≥ 30%
Column Types
System columns: Standard system columns (e.g., Action, Expected, Result)
Custom columns: User-defined custom columns
Manual Adjustments
If automatic mapping is incorrect, manually select the correct column from the dropdown
Select None for columns that do not need mapping
The column type (system/custom) is displayed on the right side of each column
Step 4: Import Execution
Run the data import in the final step.

Start Import
Click the Start Import button
The import process begins
Limitations
Current Limitations
Attachments: Importing images or videos is not supported
File Format: Only CSV format is supported (Excel not supported)
Encoding: Only UTF-8 encoding is supported